Quantcast
Channel: Scripting / Programming – Ingmar Verheij
Viewing all 35 articles
Browse latest View live

Monitor Atlantis ILIO via SNMP

$
0
0

Atlantis ILIO Center can monitor the health and availability of ILIO Session- and Replication hosts. If necessary ILIO Center sends alerts via SMTP (aka Mail) or via a SNMP trap (push). However, if the ILIO Center experiences an unexpected shutdown or network connectivity is lost, a SNMP trap is never sent (or in case of lost of network connectivity: the monitoring system does not receive the trap).

Additional monitoring can be done via ping or by monitoring the state of the VM. However, verifying the availability of a machine via ping could result in false-positives and not each monitoring system can monitor the state of a VM, therefore you might want to monitor via SNMP polling (pull).

A vanilla installation of Atlantis ILIO (Center) does not have an SNMP agent installed, therefore I wrote a script that can push the agent and/or update the configuration. You can find the download at the bottom of this article.

Packages

The script is assuming that the ILIO appliances are not connected to the internet so the packages (the redistributables) are included in the download.

Each product + version is a separate appliance, the version of some packages (like perl) differ. Therefore different versions of net-snmp are installed.

Product Version net-snmp version
Atlantis ILIO Center 4.0.19 5.4.3~dfsg-2_amd64
Atlantis ILIO for Diskless VDI 3.2.0.5 5.4.3~dfsg-2.7_amd64
Atlantis ILIO Persistent VDI
Session and Replication Host
4.0.0.1 5.4.3~dfsg-2.7_amd64

If you have a newer version and the script doesn’t work, please run dpkg –l and mail me the output.

The benefit of including the packages in the script is that it’s fast(er) and an internet connection is not required. The downside is that if Atlantis updates their appliances with a different Linux of Perl version, the script might need to be updated.


Configuration

A default configuration is applied allowing all machines to query only system and hrSystem group data using the community string public (default). The configuration is stored in the snmpd.conf file (see examples) included in the download.

For instance you might want to change the default

rocommunity public default -V systemonly

to

rocommunity mysecret 10.0.0.1 -V systemonly

to set the community string to mysecret and only allow host 10.0.0.1 to query the appliance. If you want to retrieve additional information, like processor, disk or memory usage, you might want to remove -V systemonly.

The script is build so you can easily push the new configuration to your ILIO Center, Session- and Replication hosts.


Distribute and install

To use the script you need to upload the content of the archive (for download see the bottom of the article) to your ILIO Center machine using SCP (for instance WinSCP).

  1. Connect to your ILIO Center machine via SCP
  2. Upload the files to /opt/Support/snmp
  3. Enable the eXecution bit for InstallSNMP.py (0744)

/opt/Support/snmpInstallSNMP.py permissions


To run the script you need to setup a terminal session via SSH and execute the InstallSNMP.py script.

  1. Connect to your ILIO Center machine via SSH
  2. Change the directory to /opt/Support/snmp
  3. Execute the script ./InstallSNMP

2013-06-14 20_31_00-


Usage

On execution the script will first ask you if you want to install (or update the configuration of) SNMP on the ILIO Center machine.

Install ILIO Center

Next it will ask if you want to update the other ILIO hosts (Session- and/or Replication hosts). If yes, the script will ask for the master password. If you don’t have a master password (the passwords are not equal for all hosts) just leave it blank, the script will ask for the password for each host.

Install other hosts

As mentioned in the previous chapter, in case SNMP is already installed (and running) the installation is skipped and only the new configuration is applied.

Skip if installed


Download

InstallSNMP.zip


The post Monitor Atlantis ILIO via SNMP appeared first on Ingmar Verheij.


Configure Citrix Session Printer via PowerShell

$
0
0

In a previous article I explained how you can set Citrix (domain) policies via PowerShell. In one of the comments I got a question from Tony who wanted to set Session Printers. In this article I’ll explain how this is done.

In the article I will first show a quick example and then show some more detailed setting.


The basics

Before we can set the specific Session Printers settings we need to load the correct modules, connect to the GPO and read the Citrix user policy. These steps are the same as in the – Set Citrix policies via PowerShell – article.

#Import module
Import-Module .\Citrix.GroupPolicy.Commands

#Connect PowerShell drive to Citrix domain GPO
New-PSDrive -Name CitrixGPO -PSProvider CitrixGroupPolicy -Root \ -DomainGPO "Citrix GPO"

#Read Citrix user policy
$objCitrixPolicy = Get-CtxGroupPolicyConfiguration -PolicyName "Unfiltered" -Type user -DriveName CitrixGPO

#Set session printers
$objCitrixPolicy.("SessionPrinters").State = "Enabled"
$objCitrixPolicy.("SessionPrinters").Values=@("\\DC001\Printer1,model=HP LaserJet 4, color=1, location=";"\\DC002\Printer2, model=HP LaserJet 4, location=Second floor")

#Write Citrix user policy
Set-CtxGroupPolicyConfiguration $objCitrixPolicy -DriveName CitrixGPO

#Close PowerShell Drive from Citrix domain GPO
Remove-PSDrive -Name CitrixGPO

In the example above I added two printers: Printer1 and Printer2 which are both located on the server DC001. The result is shown below.

Session Printers

In the example my GPO is called “Citrix GPO” and I’m using the “Unfiltered” Citrix policy.


SessionPrinters Values

The syntax and the possible values for the setting “SessionPrinters” are not documented in the XenApp 6.5 Powershell SDK but their quite straightforward.


In general there are two settings for each policy

  • State : Is the setting applied? Possible values are: NotConfigured, Enabled, UseDefault
  • Values: A one-dimensional array containing a list of session printers.


Session printer syntax

For each session printer one comma separated string is constructed with the following syntax

<URL>,model=<model>(,location=<location>)(optional settings)

Where

  • <URL> is Server + Shared Name (for example \\DC001\Printer1);
  • <model> is the model name of the printer, or friendly name of the printer driver (for example HP LaserJet 4);
  • <location> the location value of the shared printer (for example Second floor).

The URL and model are mandatory, the location is optional.

Session Printers - Settings

Example

Two session printers are added: Printer1 and Printer2, both hosted on DC001 with the same printer driver (HP LaserJet 4). Printer2 has a location: Second floor:

  • \\DC001\Printer1,model=HP LaserJet 4, location=
  • \\DC001\Printer2,model=HP LaserJet 4, location=Second floor

The following command can be issued from PowerShell

$objCitrixPolicy.("SessionPrinters").Values=@("\\DC001\Printer1,model=HP LaserJet 4, location=";"\\DC002\Printer2, model=HP LaserJet 4, location=Second floor")


Printer Settings

As you’ve probably noticed in the example the settings for Printer1 are marked as Modified. For each session printer you have the ability to override printers settings like print quality, orientation, paper size, etc. Each setting is added to the same string as the URL, model and location and separated by a comma ‘,’. If no value is provided the printer setting is not configured (default).

As mentioned before the possible values are not documented in the SDK so I’ve documented them here.


Basic

Printer Settings - Basic

Printer Setting Member Name Value Description
Override print quality printQuality -1 150dpi
    -2 300dpi
    -3 600dpi
    -4 1200dpi
    (numeric value) The provided value for custom horizontal
  yResolution (numeric value) The provided value for custom Vertical (only when a value is provided for printQuality)
Override orientation orientation portrait Portrait
    landscape Landscape
Override color color 1 Monochrome
    2 Color
Override duplex duplex 1 Simplex
    2 Vertical
    3 Horizontal


Advanced

Printer Settings - Advanced

Printer Setting Member Name Value Description
Override scale scale (numeric value) The provided value in percentage (for instance 100 for 100%)
Override copy count copies (numeric value) The provided value is the number of copies
  collate True / False Collation is enabled / disabled
Override TrueType option trueTypeOption 1 Bitmap
    2 Download
    3 Substitute
    4 Outline


Paper

Printer Settings - PaperEither paper size of form name is overridden, you can’t apply both .

Printer Setting Member Name Value Description
Override paper size paperSize 1 Letter
    2 Letter Small
    3 Tabloid
    4 Ledger
    5 Legal
    6 Statement
    7 Executive
    8 A3
    9 A4
    (etc.) The number increments as it’s shown in the dropdown box
Override form name formName (string value) The value provided in the value


Example

Just like the previous example two session printers are added but in this example the settings for Printer1 are changed. The print quality is lowered to 300dpi, the colors are set to monochrome and the paper size to A4.

  • \\DC001\Printer1,model=HP LaserJet 4, printQuality=-2, color=1, paperSize=9, location=
  • \\DC001\Printer2,model=HP LaserJet 4, location=Second floor

The following command can be issued from PowerShell

$objCitrixPolicy.("SessionPrinters").Values=@("\\DC001\Printer1,model=HP LaserJet 4, printQuality=-2, color=1, paperSize=9, location=";"\\DC002\Printer2, model=HP LaserJet 4, location=Second floor")


.

The post Configure Citrix Session Printer via PowerShell appeared first on Ingmar Verheij.

Read DHCP options received by the client

$
0
0

ipconfig /all

When a DHCP client receives information from a DHCP server only basic information, like IP / subnet / gateway / dns /etc, is visible. In some situations clients also receive DHCP options to set specific settings or application configurations (for example with Microsoft Lync or RES Workspace Manager). Knowing what options are received by the clients helps you troubleshoot.

There are multiple road that lead to Rome, in this article I’ll show you three. For one of them I created a PowerShell script which you can run on any machine.

Three roads to Rome

Although there are probably more, here are three roads that lead to Rome (and with Rome I mean: reading the DHCP options received by the client).

  • Wireshark
  • DHCP test client
  • Windows registry

Wireshark

wiresharkWireshark gives you (by far) the most detailed information about the DHCP process and information received. Not only does it show you what information is received, it also shows you what packets are send / received over the network.


wireshark filter bootpAll you have to do is install Wireshark on your computer (or run the portable version), start a capture, set the filter to bootp and initiate a DHCP request.


DHCP test client

DHCP test clientAnother great tool to use is the DHCP test client. This sniffs the network until a DHCP Offer / DHCP Ack is detected on UDP port 68 and shows the received information.

The benefit of the DHCP test client is that you don’t have to install anything, just run the tool and initiate a DHCP request.


Windows registry

DhcpInterfaceOptionsThe downside of both Wireshark and the DHCP test tool is that you need to capture the packets from the network when they’re send. Luckily the received packets are stored in the Windows registry key DhcpInterfaceOptions.

Unfortunately the content of this key is not easy to read and not documented (?). So without a tool / script the content of this key is useless.

PowerShell script

Since the DhcpInterfaceOptions is always accessible (even when the client already received  the DHCP offer) I wanted to have the ability to read the content. So I wrote a PowerShell script that reads the registry key for each DHCP enabled NIC and shows the received DHCP options.

The script shows all Dhcp options and vendor specific Dhcp options (43).

ReadDhcpOptions

You can find the PowerShell script here:   ReadDhcpOptions

The archive contains three files

  • DhcpOptions.csv – Semicolon separated file containing all Dhcp Options (IANA) and their data type;
  • DhcpOptionsVS.csv – Semicolon separated file containing some vendor specific Dhcp Options;
  • ReadDhcpOptions.ps1 – The actual PowerShell script

PS: My PowerShell-force is not strong, yet I managed to show the required data


Reverse engineering

Since the content of the DhcpInterfaceOptions key is not documented (or maybe I’ve searched on the wrong location) I had to reverse engineer the content. Once you know how the data is stored it’s really easy :-)

Each DHCP option the following structure is used:

  • The first byte contains the option code, followed by 7 zeroed bytes;
  • Next is a byte containing the length of the value, followed by 3 zeroed bytes;
  • Then a byte specifying if this is a vendor specific option yes (1) or no (0), followed by 3 zeroed bytes;
  • Four bytes are filled with data I can’t explain, but it always ends with 0×51.
  • Finally the value is stored (in Hex values) in a block size dividable by 4 (!)


Here’s an example of how a vendor specific option (DHCP option 43) with code 12 containing the data www.ingmarverheij.com is stored:


Data types

To present the data, as done with the PowerShell script, you must know the data type. Unfortunately this is not stored in the DhcpInterfaceOptions  key, so that’s the reason I added the CSV files. For now I included the following data type: ip / string / time / dhcpmsgtype.

If the data type is not specified in the CSV file  the data is displayed in Hex values (just like Wireshark, DHCP test client and the Windows registry).

If you receive a Dhcp option that’s displayed in Hex values you can change the CSV files or e-mail me a Wireshark capture of your DHCPOFFER.


.

The post Read DHCP options received by the client appeared first on Ingmar Verheij.

Citrix PVS: Optimize endpoint with PowerShell

$
0
0

With Citrix PVS the content of a disk is streamed over the network to an endpoint. This requires sufficient bandwidth and an optimized configuration. If both criteria are not met the endpoint suffers from delays, retries or failures.

Ain't nobody got time for thatA number of best practices apply when using Citrix PVS, most of them probably apply for your situation. In the past I had to optimize my VM’s manually each and every time I had to create a new vDisk! Ain’t nobody got time for that (link)!

I wrote a PowerShell script that optimizes the endpoint for Citrix PVS and would like to share it with you.

Updated on October 13th, 2013 with version 1.4

Applied best practices

The script applies a number of best practices to optimize the performance of the PVS endpoint. Some are enabled by default, some are not.

OptimizePVSendpoint

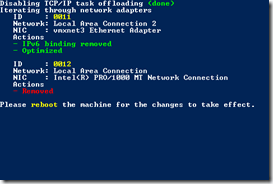
Disable Task Offload

The most generic best practice that applies for (almost) every PVS environment, disabling all of the task offloads from the TCP/IP transport. See also CTX117491


Disable IPv6

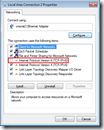
vmxnet3 Ethernet Adapter - BindingsAlthough Citrix is working hard to get IPv6 working for all Citrix products, PVS does not support IPv6. Disabling IPv6 on your PVS endpoints prevent intermittent failures. For each network adapter the IPv6 binding is removed using the nvspbind utility. This utility is included in the download. Also, slow boots could occur due to IPv6. See also this TechNet article.


Disable TSO and DMA on XenTools

When you’re running your PVS endpoints on Citrix XenServer 5.0 or 5.5 poor target device performance, sluggish mouse responsiveness, application latency and slow moving screen changes might occur. This is a known bug that’s solved in (a hotfix of XenServer 5.6). See also CTX125157.


Increase UDP FastSend threshold

For every UDP packet larger than 1024 bytes, the Windows network stack waits for a transmit completion interrupt before sending the next packet. Unlike for earlier releases, vSphere 5.1 does not provide a transparent workaround of the situation. See also KB2040065


Set multiplication factor to the default UDP scavenge value

High CPU usage occurs when a Windows Server 2008 R2-based server is under a very heavy UDP load. This issue occurs because a table is too aggressively scavenged. See also KB2685007


Icons are hidden

To prevent users from accessing system tools like the PVS target device software or VMware tools the icons are removed.


Disable VMware debug driver

The virtual machine debug driver was disabled for this virtual machine message displays in event log. The virtual machine debug driver is not required in an ESX host. The driver is used for record/play functions in Fusion and Workstation products. See also KB1007652.

Receive Side Scaling is disabled

VMXNET3 resets frequently when RSS is enabled in a multi vCPU Windows virtual machine. When Receive Side Scaling (RSS) is enabled on a multi vCPU Windows virtual machine, you see NetPort messages for repeating MAC addresses indicating that ports are being disabled and then re-enabled. See also KB2055853.


Remove non-present NICs

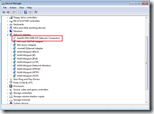
Device Manager - Network adapters - Show non present devicesAfter removing a network adapter – for instance to replace an E1000 adapter with a vmxnet3 (because your deployment tool does not support vmxnet3) – the network adapter still exists on your Windows machine. The network adapter is not visible in device manager (see KB241257) but it’s active in the IP stack and, most likely, has a higher priority. As a result the PVS target device software is unable to communicate with the streaming server.

All Ethernet adapters that are not present on the machine are removed using the DevCon utility. The utility is included in the download, in case you lost it make sure you use version 6.1.7600.16385 from the Windows 7 WDK for x64 machines.

Default setting: Enabled


Network Adapter specific optimization

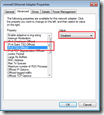
vmxnet3 Ethernet AdapterFor each network adapter (E1000, vmxnet3, vmbus, etc.) best practices exists, the most generic is disabling TCP offloading. Depending on the network adapter this has different names and some have more than one feature to disable.

Default setting: Enabled


The script changes the following sets the following properties:

Network Adapter Property Value
E1000 (VMware) Large Send Offload (IPv4) Disabled
vmxnet3 (VMware) IPv4 Giant TSO Offload Disabled
IPv4 TSO Offload Disabled
xennet6 (XenServer) Large Send Offload Version 2 (IPv4) Disabled
vmbus (Hyper-V) Large Send Offload Version 2 (IPv4) Disabled
Missing an adapter? Drop me an e-mail at info@ingmarverheij.com

All other properties listed in the Ethernet Adapter Properties dialog can be changed as well. All known properties and values are provided in the script, all you have to do is uncomment (removing the #-character) and set the value you want.  Do NOT enable options before you’ve tested this first and understand what the implications are.


Example
You want disable IPv4 Checksum Offload for the vmxnet3 adapter. The default value is 3 (Tx and Rx Enabled), to disable the feature you need to set the value to 0.  In the script go to lines 256, remove the # in front of  ‘Set-ItemProperty’ and set the value “0” and the end of the statement.

# --- IPv4 Checksum Offload ---
$strRegistryKeyName = "*IPChecksumOffloadIPv4"
# 0 - Disabled
# 1 - Tx Enabled
# 2 - Rx Enabled
# 3 - Tx and Rx Enabled (default)
Set-ItemProperty -Path ("HKLM:\SYSTEM\CurrentControlSet\Control\Class\{0}\{1}" -f "{4D36E972-E325-11CE-BFC1-08002BE10318}", ( "{0:D4}" -f $intNICid)) -Name $strRegistryKeyName -Value "0"


Tested platforms

The script is tested on multiple hypervisor platforms to ensure it covers the majority of the environments. In case your missing a hypervisor (or a version) feel free to contact me at info@ingmarverheij.com.

  • Citrix XenServer (6.0, 6.02 and 6.2)
  • Microsoft Hyper-V (2.0, 3.0 / 2012)
  • VMware ESX (4.0, 5.0 and 5.1)


Usage and download

The script runs without arguments but requires elevated privileges, this is enforced by the script. Within the script you can enable / disable the features in the global options section (eg removing hidden NIC’s or unbinding IPv6). If wanted you can set advanced NIC properties by uncommenting the statement and providing the new value.

You can download the files here: OptimizePVSendpoint


.

Thanks

I would like to thank the following people who where kind enough to test the script and provide me with feedback and test data:

  • Kees Baggerman – link
  • Wilco van Bragt – link
  • Iain Brighton – link
  • Tom Gamull – link
  • Andrew Morgan – link
  • Shaun Ritchie – link
  • Jeff Wouters – link
  • Bram Wolfs – link
  • Jonathan Pitre – link


.

The post Citrix PVS: Optimize endpoint with PowerShell appeared first on Ingmar Verheij.

Run and compile .NET code in RES Workspace Manager (using PowerShell)

$
0
0

There are occasions where you need a custom solution to fulfill a requirement which cannot be solved with existing applications or tools. This is usually where scripting comes into the picture, nowadays we tend to built most scripts using Microsoft PowerShell as it’s a very powerful framework with a huge repository of cmdlets. Nonetheless there are situation where PowerShell has no built-in cmdlet (or third party cmdlet is available) and you’d have to revert to API’s or .NET code.

Wouldn’t it be a shame if you’d have to write and compile .NET code using an IDE like Visual Studio before you can use that code? Well, there’s a solution!

Common Intermediate Language

“Windows PowerShell is Microsoft’s task automation and configuration management framework, consisting of a command-line shell and associated scripting language built on the .NET Framework. Common Intermediate LanguagePowerShell provides full access to COM and WMI, enabling administrators to perform administrative tasks on both local and remote Windows systems as well as WS-Management and CIM enabling management of remote Linux systems and network devices.”  – Source: Wikipedia

While you’d probably already knew PowerShell is built on the .NET Framework and therefor compiles to common intermediate language (CIL) before being executed, just like all other .NET languages like Visual C++.NET, Visual C#.NET, VB.NET and more. As a result a PowerShell script that’s executed effectively  results in the same code as when it’s executed in C# or C++, one of the strengths of .NET.


Add-Type

In PowerShell, administrative tasks are generally performed by cmdlets (pronounced command-lets), which are specialized .NET classes implementing a particular operation. One of the more powerful cmdlets is Add-Type.

Adds a Microsoft .NET Framework type (a class) to a Windows PowerShell session.

So with the Add-Type cmdlet you can basically run any .NET code as long as you can define it in a .NET Framework class. And yes this includes API’s Smile . There are a number of parameters (all of which are optional) you can provide of which a few of them I’ll describe below for all other information: MSDN

For this article I’ll assume you want to run or compile code from the PowerShell script, not refer to an assembly stored elsewhere (although that’s possible). If you only want to run the code from the PowerShell script there’s no need to specify the output, but if you want you can using OutputType and OutputAssembly.

Parameter Description Example values
Language Specifies the language that is used in the source code - CSharp (default)
- CSharpVersion3
- VisualBasic
- JScript
CompilerParameters Specifies the options for the source code compiler. These options are sent to the compiler without revision. Options like /unsafe, for more options see MSDN
OutputType Specifies the output type of the output assembly - Library
- ConsoleApplication
- WindowsApplication

By default no output type is specified (the code is not compiled to an assembly)OutputAssemblyGenerates a DLL (or EXE) file for the assembly with the specified name in the location. Enter a path (optional) and file name. Wildcard characters are permitted TypeDefinition

OR

@Specifies the source code that contains the type definitions. Enter the source code in a string or here-string, or enter a variable that contains the source code. UsingNamespaceSpecifies other namespaces that are required for the class. This is much like the Using keyword in C#.All .available .NET namespaces, for instance System.IO


Example

Knowing which cmdlet can be used to run or compile .NET code how is this actually done? Let me show how in two examples. The first example will show you how to run .NET code that enables you to directly use an API in PowerShell, in the second example I’ll show you how to compile .NET code to a console application.


Example 1 – Run an API from a PowerShell script

In this example I’ll show you how you can call the SendMessage function (or API) directly from a PowerShell script. In the example I’ve placed C# code in a string $Win32_SendMessage which I’ll add using the Add-Type cmdlet so I can call it from PowerShell.

$Win32_SendMessage = @'
using System;
using System.Runtime.InteropServices;
    public static class Win32 {
    public static uint WM_CLOSE = 0x10;
    public static uint WM_DESTROY = 0x0002;

    [DllImport("user32.dll", CharSet = CharSet.Auto, SetLastError = false)]
    public static extern IntPtr SendMessage(IntPtr hWnd, UInt32 Msg, IntPtr wParam, IntPtr lParam);
}
'@

Add-Type -TypeDefinition $Win32_SendMessage

$p = @(Get-Process -Name Notepad)[0]
[Win32]::SendMessage($p.MainWindowHandle, [Win32]::WM_CLOSE, $zero, $zero) > $null

The script will close Notepad by sending a WM_CLOSE message to the process.


Example 2 – Compile c# code to a console application

In this example I’ll show you how to compile c# sharp code to a console application using PowerShell. The example  is the typical Hello World code from the a the C# Hello World Tutorial.

Add-Type -OutputType ConsoleApplication -OutputAssembly "HelloWorld.exe" @'
public class Hello1
{
   public static void Main()
   {
      System.Console.WriteLine("Hello, World!");
   }
}
'@

The output of the script is an console application called “HelloWorld.exe” which, when executed, prints “Hello, World!” on the screen.


RES Workspace Manager (optional)

Now you know how you can use PowerShell to run and compile all .NET code using PowerShell without having an IDE (like Visual Studio) let me show you how you do this using RES Workspace Manager. Depending on your needs you want to use RES Workspace Manager, or not.

The advantage of using RES Workspace Manager to run .NET code is timing and security,. You decide at what event (like user logon, network state change or when an application is launched – very powerful!) the code is executed from a managed environment. There’s no need to worry about if the script files are accessible or when someone’s changed it, that’s all available by default.

Command

RES Workspace Manager can execute commands to run applications tools or tools but can also run a script. When code is put in the script tab and %script% is used in the command line (or parameter) a temporary file with the provided extension is created on execution.

If RES Workspace Manager needs to execute a PowerShell script the following command line can be provided:

powershell.exe %script%

Personally I prefer to specify the full path and included parameters to set the execution policy, but his is optional:

%Windir%\System32\WindowsPowerShell\v1.0\powershell.exe -ExecutionPolicy Bypass %Script%

Execute Command - PropertiesExecute Command - Script


Dynamic Privileges

Even better is the ability to execute a command (or a script) with administrative privileges even when the user hasn’t. This means that a regular user can execute a very powerful PowerShell script (calling API’s and stuff) with administrative privileges without granting this user with permissions it shouldn’t have. Dynamic Privileges are cool IMHO, especially since you can enable this feature on a specific action for an application or for the whole application.

Execute Command - Properties - Dynamic Priviliges

.

.

The post Run and compile .NET code in RES Workspace Manager (using PowerShell) appeared first on Ingmar Verheij.

Set DCOM remote access via PowerShell

$
0
0

If you want to use the Delivery Services Console (the management console of Citrix XenApp 6.x) from a remote machine, you need to enable remote access in DCOM (as described in CTX131829).

You can automate this via PowerShell using the script found below.

Set-RemotePermission-DCOM.ps1

PARAM( 
	[string]$Principal = $(throw "`nMissing -Principal DOMAIN\Group"), 
	$Computers = $(throw "`nMissing -Computers ('server01','server02')"))

# USAGE: 
# .\Set-RemotePermission-DCOM.ps1 -Principal "DOMAIN\" -Computers ('', '',...)
#
# EXAMPLE:
# .\Set-RemotePermission-DCOM.ps1 -Principal "DOMAIN\LG-Citrix-Admins" -Computers ('CTX_DC001', 'CTX_DC002')
#
# Inspired by Karl Mitschke's post:
# https://unlockpowershell.wordpress.com/2009/11/20/script-remote-dcom-wmi-access-for-a-domain-user/
#
# And inspired Brad Turner's post:
# https://social.technet.microsoft.com/Forums/en-US/ilm2/thread/5db2707c-87c9-4bb2-a0eb-912363e2814a/

function get-sid
{
 PARAM ($DSIdentity)
 $ID = new-object System.Security.Principal.NTAccount($DSIdentity)
 return $ID.Translate( [System.Security.Principal.SecurityIdentifier] ).toString()
}

$sid = get-sid $Principal

#DefaultLaunchPermission - Local Launch, Remote Launch, Local Activation, Remote Activation
$DCOMSDDLDefaultLaunchPermission = "A;;CCDCLCSWRP;;;$sid"

#DefaultAccessPermision - Local Access, Remote Access
$DCOMSDDLDefaultAccessPermision = "A;;CCDCLC;;;$sid"

#PartialMatch
$DCOMSDDLPartialMatch = "A;;\w+;;;$sid"

foreach ($strcomputer in $computers)
{
 write-host "`nWorking on $strcomputer with principal $Principal ($sid):"
 # Get the respective binary values of the DCOM registry entries
 $Reg = [WMIClass]"\\$strcomputer\root\default:StdRegProv"
 $DCOMDefaultLaunchPermission = $Reg.GetBinaryValue(2147483650,"software\microsoft\ole","DefaultLaunchPermission").uValue
 $DCOMDefaultAccessPermission = $Reg.GetBinaryValue(2147483650,"software\microsoft\ole","DefaultAccessPermission").uValue

 # Convert the current permissions to SDDL
 write-host "`tConverting current permissions to SDDL format..."
 $converter = new-object system.management.ManagementClass Win32_SecurityDescriptorHelper
 $CurrentDCOMSDDLDefaultLaunchPermission = $converter.BinarySDToSDDL($DCOMDefaultLaunchPermission)
 $CurrentDCOMSDDLDefaultAccessPermission = $converter.BinarySDToSDDL($DCOMDefaultAccessPermission)

 # Build the new permissions
 if (($CurrentDCOMSDDLDefaultLaunchPermission.SDDL -match $DCOMSDDLPartialMatch) -and ($CurrentDCOMSDDLDefaultLaunchPermission.SDDL -notmatch $DCOMSDDLDefaultLaunchPermission))
 {
   $NewDCOMSDDLDefaultLaunchPermission = $CurrentDCOMSDDLDefaultLaunchPermission.SDDL -replace $DCOMSDDLPartialMatch, $DCOMSDDLDefaultLaunchPermission
 }
 else
 {
   $NewDCOMSDDLDefaultLaunchPermission = $CurrentDCOMSDDLDefaultLaunchPermission.SDDL + "(" + $DCOMSDDLDefaultLaunchPermission + ")"
 }

 if (($CurrentDCOMSDDLDefaultAccessPermission.SDDL -match $DCOMSDDLPartialMatch) -and ($CurrentDCOMSDDLDefaultAccessPermission.SDDL -notmatch $DCOMSDDLDefaultAccessPermision))
 {
   $NewDCOMSDDLDefaultAccessPermission = $CurrentDCOMSDDLDefaultAccessPermission.SDDL -replace $DCOMSDDLPartialMatch, $DCOMSDDLDefaultAccessPermision
 }
 else
 {
   $NewDCOMSDDLDefaultAccessPermission = $CurrentDCOMSDDLDefaultAccessPermission.SDDL + "(" + $DCOMSDDLDefaultAccessPermision + ")"
 }

 # Convert SDDL back to Binary
 write-host "`tConverting SDDL back into binary form..."
 $DCOMbinarySDDefaultLaunchPermission = $converter.SDDLToBinarySD($NewDCOMSDDLDefaultLaunchPermission)
 $DCOMconvertedPermissionDefaultLaunchPermission = ,$DCOMbinarySDDefaultLaunchPermission.BinarySD

 $DCOMbinarySDDefaultAccessPermission = $converter.SDDLToBinarySD($NewDCOMSDDLDefaultAccessPermission)
 $DCOMconvertedPermissionsDefaultAccessPermission = ,$DCOMbinarySDDefaultAccessPermission.BinarySD

 # Apply the changes
 write-host "`tApplying changes..."
 if ($CurrentDCOMSDDLDefaultLaunchPermission.SDDL -match $DCOMSDDLDefaultLaunchPermission)
 {
   write-host "`t`tCurrent DefaultLaunchPermission matches desired value."
 }
 else
 {
   $result = $Reg.SetBinaryValue(2147483650,"software\microsoft\ole","DefaultLaunchPermission", $DCOMbinarySDDefaultLaunchPermission.binarySD)
   if($result.ReturnValue='0'){write-host "  Applied DefaultLaunchPermission complete."}
 }

 if ($CurrentDCOMSDDLDefaultAccessPermission.SDDL -match $DCOMSDDLDefaultAccessPermision)
 {
   write-host "`t`tCurrent DefaultAccessPermission matches desired value."
 }
 else
 {
   $result = $Reg.SetBinaryValue(2147483650,"software\microsoft\ole","DefaultAccessPermission", $DCOMbinarySDDefaultAccessPermission.binarySD)
   if($result.ReturnValue='0'){write-host "  Applied DefaultAccessPermission complete."}

 }
}
#----------------------------------------------------------------------------------------------------------
 trap 
 { 
 $exMessage = $_.Exception.Message
 if($exMessage.StartsWith("L:"))
 {write-host "`n" $exMessage.substring(2) "`n" -foregroundcolor white -backgroundcolor darkblue}
 else {write-host "`nError: " $exMessage "`n" -foregroundcolor white -backgroundcolor darkred}
 Exit
 }
#----------------------------------------------------------------------------------------------------------

Download

Set-RemotePermission-DCOM.ps1


Usage

.\Set-RemoteAccess-DCOM.ps1 -Principal Contoso\LG-Citrix Admins" -Computers 'LocalHost'
.\Set-RemoteAccess-DCOM.ps1 -Principal Contoso\LG-Citrix Admins" -Computers 'CTX_DC001'
.\Set-RemoteAccess-DCOM.ps1 -Principal Contoso\LG-Citrix Admins" -Computers ('CTX_DC001', 'CTX_DC002')


PS: The script is based on the script found in this technet forum post.


As requested by Neil Spelling:

The post Set DCOM remote access via PowerShell appeared first on Ingmar Verheij.

DataSet.ReadXML throws DirectoryNotFoundException

$
0
0

A .NET application that reads a dataset from an XML using the DataSet.ReadXML method might throw the exception : System.IO.DirectoryNotFoundException: Could not find a part of the path ‘<path of XML file>’.

According to MSDN this exception is thrown when when “part of a file or directory cannot be found” .However, this exception is not only thrown when a file cannot be found on the disk. The exception is also thrown when the structure of the XML is invalid (for instance because you didn’t close a node)

Example

Good structure

<books>
   <title>Xml For Dummies</title>
   <author>Lucinda Dykes, Ed Tittel</author>
   <URL>https://books.google.nl/books/about/Xml_For_Dummies.html?id=T0zQVjBTlzAC&#38;redir_esc=y</URL>
</books>

Bad structure

<books>
   <title>Xml For Dummies</title>
   <author>Lucinda Dykes, Ed Tittel   <— something is missing here
   <URL>https://books.google.nl/books/about/Xml_For_Dummies.html?id=T0zQVjBTlzAC&#38;redir_esc=y</URL>
</books>


Validate in code

Before you read an XML file using the DataSet.ReadXML method, always validate the XML file (against a schema). This can easily be done by first reading the XML file with the XmlReaderSettings or  XmlValidatingReader class. By validating the XML file you’re always sure the structure of the file is correct and the ReadXML method won’t raise a bogus event.

Microsoft has supplied us with some examples here and here.


Validate manually

You can validate your XML file manually by opening the XML file in Internet Explorer. If the file structured correct you’’ll be able to expand and collapse the nodes.

The post DataSet.ReadXML throws DirectoryNotFoundException appeared first on Ingmar Verheij.

Using objects as key in HashTable

$
0
0

A HashTable can be used to store a collection of key/value pairs. The key object is used to uniquely identify the key/value pair which makes is easy to store data like a database.

The type of the key object which is added to the HashTable is variable. It can be an integer, a string, a GUID etc. Because of the nature of a GUID (a globally unique identifier) it is an ideal candidate for a key object.

If you want to use a combination of two (or more) GUIDS as a key object you can create a class object, but there is a caveat.

Example #1 – How you shouldn’t use it

Let’s take create two GUID objects, called objKey1 and objKey2, and fill them with a GUID.

Dim objKey1 As Guid = New Guid("423baa7b-4f46-4b42-b3e8-498e11099544")
Dim objKey2 As Guid = New Guid("f0bcf839-4349-4ff2-8695-6a91df86cabb")

Now where going to create a hashtable called objHashTable where the key/value pairs are stored.

Dim objHashTable As New Hashtable()

Because we want to store two GUID’s as a key object where going to create a simple class called ValueKey.

Private Class ValueKey
   Public Key1 As Guid
   Public Key2 As Guid
   Public Sub New(Key1ID As Guid, Key2ID As Guid)
       Key1 = Key1ID
       Key2 = Key2ID
   End Sub
End Class

Now let’s add a key/value pair to the hashable

objHashTable.Add(objKey, Date.Now)

The hashtable objHashTable now contains one key/value pair. We can check if the key object we’ve just added is in the hashtable:

Debug.Print("Key found #1 : " & objHashTable.ContainsKey(objKey))

Key found #1 : True

Okay, as expected. Now let’s create a new object key with exact the same content (objKey1 and objKey2)

objKey = New ValueKey(objKey1, objKey2)

Since the content of the key is exactly the same (objKey1 and objKey2 isn’t changed) you expect the key to be present in the hashtable:

Debug.Print("Key found #2 : " & objHashTable.ContainsKey(objKey))

Key found #1 : False

That was NOT the expected result. Although the content of the key object is equal, the hashtable can’t find the key object.


Example #2 – How you should use it

The problem in example 1 is caused by the uniqueness of the KeyValue class. If you compare the two objects with Object.Equals method you’ll notice they are not equal. If the objects are not equal, the key value in the hashtable will never match.

The solution lies in the KeyValue class, it needs an override for the Equals (and GetHashCode) method.

So let’s use the same code as in example 1 but add an override for the Equals and GetHashCode in the KeyValue class.

Private Sub Form1_Load(sender As System.Object, e As System.EventArgs) Handles MyBase.Load
    Dim objKey1 As Guid = New Guid("423baa7b-4f46-4b42-b3e8-498e11099544")
    Dim objKey2 As Guid = New Guid("f0bcf839-4349-4ff2-8695-6a91df86cabb")
    Dim objHashTable As New Hashtable()
    Dim objKey As New ValueKey(objKey1, objKey2)
    objHashTable.Add(objKey, Date.Now)
    Debug.Print("Key found #1 : " & objHashTable.ContainsKey(objKey))

    objKey = New ValueKey(objKey1, objKey2)
    Debug.Print("Key found #2 : " & objHashTable.ContainsKey(objKey))
    End
End Sub

Private Class ValueKey
    Public Key1 As Guid
    Public Key2 As Guid
    Public Sub New(Key1ID As Guid, Key2ID As Guid)
        Key1 = Key1ID
        Key2 = Key2ID
    End Sub
    Public Overrides Function Equals(ByVal obj As Object) As Boolean
       If obj Is Nothing OrElse Not [GetType]().Equals(obj.GetType()) Then Return False
       Return (Key1.Equals(obj.Key1)) And (Key2.Equals(obj.Key2))
    End Function
    Public Overrides Function GetHashCode() As Integer
       Return (BitConverter.ToInt32(Key1.ToByteArray, 0) / 2) + (BitConverter.ToInt32(Key2.ToByteArray, 0) / 2)
    End Function
End Class

Key found #1 : True

Key found #2 : True

The post Using objects as key in HashTable appeared first on Ingmar Verheij.


PowerShell: Query Cisco (Catalyst 4500) Flow Control statistics

$
0
0

Last week I attended E2EVC in Vienna, a non-commercial,virtualization community Event, and attended a session of Saša Mašić about an issue he had at a customer. In short, the problems where caused by a switch that couldn’t process IP packets because it overflowed, and therefore Ethernet flow control temporarily stopped the transmission of some attached devices. Although I’m no network expert I do know this might be a serious issue. After reading this article, you might agree.

If you’re looking for the PowerShell script, scroll to the bottom.

RxPause and TxPause

This week I  was asked to troubleshoot performance issues at a customer and got informed that the core switches (Cisco Catalyst 4500) might be over capacity. A quick look in the flow control statistics (# show flowcontrol) indicated there where send numerous RxPause and TxPause packages, a sign Flow Control has been active.


Port       Send FlowControl  Receive FlowControl  RxPause TxPause
           admin    oper     admin    oper
---------  -------- -------- -------- --------    ------- -------
Gi1/1      off      off      desired  on          0       0
Gi1/2      off      off      desired  off         0       0
Gi2/1      on       on       desired  on          0       0
Gi2/2      on       on       desired  on          72982   0
Gi2/3      on       on       desired  on          0       0
Gi2/4      on       on       desired  on          0       0
(...)
Po1        Unsupp.  Unsupp.  desired  off         0       0
Po2        Unsupp.  Unsupp.  desired  off         0       0
Po3        Unsupp.  Unsupp.  desired  off         0       315
Po4        Unsupp.  Unsupp.  desired  off         386006  12387
(...)

Since the IOS (not to confuse with the OS on Apple devices) was recently upgraded the statistics where  “fresh”. In order to troubleshoot I need to collect the metrics over a longer period from multiple (core) switches, I needed an automated solution.

SNMP

The easiest (and most obvious) method would be to use SNMP to query the statistics. I found it the “easiest” way of finding the correct OID by “walking” the values (querying all exposed values) and match it with the values I found in the terminal session (# show flowcontrol).. In short, it wasn’t exposed.


PowerShell

I needed an automated solution that queried multiple switches and store to a file it so I can analyze the data later. Since it temporary I didn’t find it necessary to store it in a SQL database, a comma-separated-file (CSV) would be just fine (if you need to store it in SQL, contact me).

I’ve localized the ‘comma’ in the comma-separated-file since this is different in some countries. A Dutch operating system for instance has a semicolon.

The IOS on the core switches didn’t have cryptography so I was unable to use SSH, therefore I used telnet to connect to the switches.


Download

FlowControl.ps1


Usage: FlowControl.ps1 –remoteHost [–remotePort] [–username] –password  [-enablePassword]  [-timeout]

  • remoteHost  : The host where to connect to (FQDN or IP)
  • remotePort (optional): The port to connect to (default 23)
  • username (optional) : The user to authenticate with (default: admin)
  • password:  The password to authenticate with
  • enablePassword (optional): The enable password (default equal to password)
  • timeout (optional): The timeout in seconds for each action (default 30)


Credits

The wheel is round, we all know that, so why should I reinvent it? I used a PowerShell script to do an SNMP telnet test from Glen Scales and worked from there. Appending data to a CSV file is by default not possible, so I’ve used the altered function from Dmitry Sotnikov.

The post PowerShell: Query Cisco (Catalyst 4500) Flow Control statistics appeared first on Ingmar Verheij.

Configure WANem via PowerShell

$
0
0

If you want to simulate a WAN connection (lower bandwidth, add delay, jitter, etc.) then WANem is a solution that is (relatively) easy to use and free.


Configuring the WAN emulator is done via a webpage, but unfortunately there are no API’s exposed to automate the configuration.

Since I needed to automate the configuration of the WAN emulator I wrote a PowerShell script. You can find the PowerShell scrip below.

Download

ConfigureWanEm.ps1


Functions

The PowerShell script contains two WANem functions

  • WANEmulator_Reset – Resets the configuration (of the optional interface)
  • WANEmulator_Set – Sets the specified parameters (for the optional interface)


Usage

WANEmulator_Reset –HostName [-Interface]

  • HostName : The hostname of the WANem appliance (FQDN or IP address)
  • Interface : The interface to configure (default 0)


WANEmulator_Set –HostName [-Interface]

  • HostName : The hostname of the WANem appliance (FQDN or IP address)
  • Interface : The interface to configure (default 0)
  • PacketLimit : The packet limit (default 1000)
  • SymmetricalNetwork : Symmetrical network (Default Yes)
  • BandwidthPreset : A preset bandwidhth configuration (Default Other)
  • BandwidthSpecify : A bandwidth limit in Kbps (Default 0)
  • DelayTime : Delay time in milliseconds (Default 0)
  • Etcetera

All items that are configurable in the advanced configuration page of WANem are available as a parameter. The parameters that are shown in a dropbown box, like the bandwidth preset, are presented as an enumerable type. WYSIWYG.

The post Configure WANem via PowerShell appeared first on Ingmar Verheij.

Monitor Atlantis ILIO via SNMP

$
0
0

Atlantis ILIO Center can monitor the health and availability of ILIO Session- and Replication hosts. If necessary ILIO Center sends alerts via SMTP (aka Mail) or via a SNMP trap (push). However, if the ILIO Center experiences an unexpected shutdown or network connectivity is lost, a SNMP trap is never sent (or in case of lost of network connectivity: the monitoring system does not receive the trap).

Additional monitoring can be done via ping or by monitoring the state of the VM. However, verifying the availability of a machine via ping could result in false-positives and not each monitoring system can monitor the state of a VM, therefore you might want to monitor via SNMP polling (pull).

A vanilla installation of Atlantis ILIO (Center) does not have an SNMP agent installed, therefore I wrote a script that can push the agent and/or update the configuration. You can find the download at the bottom of this article.

Packages

The script is assuming that the ILIO appliances are not connected to the internet so the packages (the redistributables) are included in the download.

Each product + version is a separate appliance, the version of some packages (like perl) differ. Therefore different versions of net-snmp are installed.

Product Version net-snmp version
Atlantis ILIO Center 4.0.19 5.4.3~dfsg-2_amd64
Atlantis ILIO for Diskless VDI 3.2.0.5 5.4.3~dfsg-2.7_amd64
Atlantis ILIO Persistent VDI
Session and Replication Host
4.0.0.1 5.4.3~dfsg-2.7_amd64

If you have a newer version and the script doesn’t work, please run dpkg –l and mail me the output.

The benefit of including the packages in the script is that it’s fast(er) and an internet connection is not required. The downside is that if Atlantis updates their appliances with a different Linux of Perl version, the script might need to be updated.


Configuration

A default configuration is applied allowing all machines to query only system and hrSystem group data using the community string public (default). The configuration is stored in the snmpd.conf file (see examples) included in the download.

For instance you might want to change the default

 rocommunity public default -V systemonly

to

 rocommunity mysecret 10.0.0.1 -V systemonly

to set the community string to mysecret and only allow host 10.0.0.1 to query the appliance. If you want to retrieve additional information, like processor, disk or memory usage, you might want to remove -V systemonly.

The script is build so you can easily push the new configuration to your ILIO Center, Session- and Replication hosts.


Distribute and install

To use the script you need to upload the content of the archive (for download see the bottom of the article) to your ILIO Center machine using SCP (for instance WinSCP).

  1. Connect to your ILIO Center machine via SCP
  2. Upload the files to /opt/Support/snmp
  3. Enable the eXecution bit for InstallSNMP.py (0744)

/opt/Support/snmpInstallSNMP.py permissions


To run the script you need to setup a terminal session via SSH and execute the InstallSNMP.py script.

  1. Connect to your ILIO Center machine via SSH
  2. Change the directory to /opt/Support/snmp
  3. Execute the script ./InstallSNMP

2013-06-14 20_31_00-


Usage

On execution the script will first ask you if you want to install (or update the configuration of) SNMP on the ILIO Center machine.

Install ILIO Center

Next it will ask if you want to update the other ILIO hosts (Session- and/or Replication hosts). If yes, the script will ask for the master password. If you don’t have a master password (the passwords are not equal for all hosts) just leave it blank, the script will ask for the password for each host.

Install other hosts

As mentioned in the previous chapter, in case SNMP is already installed (and running) the installation is skipped and only the new configuration is applied.

Skip if installed


Download

InstallSNMP.zip


The post Monitor Atlantis ILIO via SNMP appeared first on Ingmar Verheij.

Configure Citrix Session Printer via PowerShell

$
0
0

In a previous article I explained how you can set Citrix (domain) policies via PowerShell. In one of the comments I got a question from Tony who wanted to set Session Printers. In this article I’ll explain how this is done.

In the article I will first show a quick example and then show some more detailed setting.

The basics

Before we can set the specific Session Printers settings we need to load the correct modules, connect to the GPO and read the Citrix user policy. These steps are the same as in the – Set Citrix policies via PowerShell – article.

#Import module
Import-Module .\Citrix.GroupPolicy.Commands

#Connect PowerShell drive to Citrix domain GPO
New-PSDrive -Name CitrixGPO -PSProvider CitrixGroupPolicy -Root \ -DomainGPO "Citrix GPO"

#Read Citrix user policy
$objCitrixPolicy = Get-CtxGroupPolicyConfiguration -PolicyName "Unfiltered" -Type user -DriveName CitrixGPO

#Set session printers
$objCitrixPolicy.("SessionPrinters").State = "Enabled"
$objCitrixPolicy.("SessionPrinters").Values=@("\\DC001\Printer1,model=HP LaserJet 4, color=1, location=";"\\DC002\Printer2, model=HP LaserJet 4, location=Second floor")

#Write Citrix user policy
Set-CtxGroupPolicyConfiguration $objCitrixPolicy -DriveName CitrixGPO

#Close PowerShell Drive from Citrix domain GPO
Remove-PSDrive -Name CitrixGPO

In the example above I added two printers: Printer1 and Printer2 which are both located on the server DC001. The result is shown below.

Session Printers

In the example my GPO is called “Citrix GPO” and I’m using the “Unfiltered” Citrix policy.


SessionPrinters Values

The syntax and the possible values for the setting “SessionPrinters” are not documented in the XenApp 6.5 Powershell SDK but their quite straightforward.


In general there are two settings for each policy

  • State : Is the setting applied? Possible values are: NotConfigured, Enabled, UseDefault
  • Values: A one-dimensional array containing a list of session printers.


Session printer syntax

For each session printer one comma separated string is constructed with the following syntax

<URL>,model=<model>(,location=<location>)(optional settings)

Where

  • <URL> is Server + Shared Name (for example \\DC001\Printer1);
  • <model> is the model name of the printer, or friendly name of the printer driver (for example HP LaserJet 4);
  • <location> the location value of the shared printer (for example Second floor).

The URL and model are mandatory, the location is optional.

Session Printers - Settings

Example

Two session printers are added: Printer1 and Printer2, both hosted on DC001 with the same printer driver (HP LaserJet 4). Printer2 has a location: Second floor:

  • \\DC001\Printer1,model=HP LaserJet 4, location=
  • \\DC001\Printer2,model=HP LaserJet 4, location=Second floor

The following command can be issued from PowerShell

$objCitrixPolicy.("SessionPrinters").Values=@("\\DC001\Printer1,model=HP LaserJet 4, location=";"\\DC002\Printer2, model=HP LaserJet 4, location=Second floor")


Printer Settings

As you’ve probably noticed in the example the settings for Printer1 are marked as Modified. For each session printer you have the ability to override printers settings like print quality, orientation, paper size, etc. Each setting is added to the same string as the URL, model and location and separated by a comma ‘,’. If no value is provided the printer setting is not configured (default).

As mentioned before the possible values are not documented in the SDK so I’ve documented them here.


Basic

Printer Settings - Basic

Printer Setting Member Name Value Description
Override print quality printQuality -1 150dpi
    -2 300dpi
    -3 600dpi
    -4 1200dpi
    (numeric value) The provided value for custom horizontal
  yResolution (numeric value) The provided value for custom Vertical (only when a value is provided for printQuality)
Override orientation orientation portrait Portrait
    landscape Landscape
Override color color 1 Monochrome
    2 Color
Override duplex duplex 1 Simplex
    2 Vertical
    3 Horizontal


Advanced

Printer Settings - Advanced

Printer Setting Member Name Value Description
Override scale scale (numeric value) The provided value in percentage (for instance 100 for 100%)
Override copy count copies (numeric value) The provided value is the number of copies
  collate True / False Collation is enabled / disabled
Override TrueType option trueTypeOption 1 Bitmap
    2 Download
    3 Substitute
    4 Outline


Paper

Printer Settings - PaperEither paper size of form name is overridden, you can’t apply both .

Printer Setting Member Name Value Description
Override paper size paperSize 1 Letter
    2 Letter Small
    3 Tabloid
    4 Ledger
    5 Legal
    6 Statement
    7 Executive
    8 A3
    9 A4
    (etc.) The number increments as it’s shown in the dropdown box
Override form name formName (string value) The value provided in the value


Example

Just like the previous example two session printers are added but in this example the settings for Printer1 are changed. The print quality is lowered to 300dpi, the colors are set to monochrome and the paper size to A4.

  • \\DC001\Printer1,model=HP LaserJet 4, printQuality=-2, color=1, paperSize=9, location=
  • \\DC001\Printer2,model=HP LaserJet 4, location=Second floor

The following command can be issued from PowerShell

$objCitrixPolicy.("SessionPrinters").Values=@("\\DC001\Printer1,model=HP LaserJet 4, printQuality=-2, color=1, paperSize=9, location=";"\\DC002\Printer2, model=HP LaserJet 4, location=Second floor")


.

The post Configure Citrix Session Printer via PowerShell appeared first on Ingmar Verheij.

Read DHCP options received by the client

$
0
0

ipconfig /all

When a DHCP client receives information from a DHCP server only basic information, like IP / subnet / gateway / dns /etc, is visible. In some situations clients also receive DHCP options to set specific settings or application configurations (for example with Microsoft Lync or RES Workspace Manager). Knowing what options are received by the clients helps you troubleshoot.

There are multiple road that lead to Rome, in this article I’ll show you three. For one of them I created a PowerShell script which you can run on any machine.

Three roads to Rome

Although there are probably more, here are three roads that lead to Rome (and with Rome I mean: reading the DHCP options received by the client).

  • Wireshark
  • DHCP test client
  • Windows registry

Wireshark

wiresharkWireshark gives you (by far) the most detailed information about the DHCP process and information received. Not only does it show you what information is received, it also shows you what packets are send / received over the network.


wireshark filter bootpAll you have to do is install Wireshark on your computer (or run the portable version), start a capture, set the filter to bootp and initiate a DHCP request.


DHCP test client

DHCP test clientAnother great tool to use is the DHCP test client. This sniffs the network until a DHCP Offer / DHCP Ack is detected on UDP port 68 and shows the received information.

The benefit of the DHCP test client is that you don’t have to install anything, just run the tool and initiate a DHCP request.


Windows registry

DhcpInterfaceOptionsThe downside of both Wireshark and the DHCP test tool is that you need to capture the packets from the network when they’re send. Luckily the received packets are stored in the Windows registry key DhcpInterfaceOptions.

Unfortunately the content of this key is not easy to read and not documented (?). So without a tool / script the content of this key is useless.

PowerShell script

Since the DhcpInterfaceOptions is always accessible (even when the client already received  the DHCP offer) I wanted to have the ability to read the content. So I wrote a PowerShell script that reads the registry key for each DHCP enabled NIC and shows the received DHCP options.

The script shows all Dhcp options and vendor specific Dhcp options (43).

ReadDhcpOptions

You can find the PowerShell script here:   ReadDhcpOptions

The archive contains three files

  • DhcpOptions.csv – Semicolon separated file containing all Dhcp Options (IANA) and their data type;
  • DhcpOptionsVS.csv – Semicolon separated file containing some vendor specific Dhcp Options;
  • ReadDhcpOptions.ps1 – The actual PowerShell script

PS: My PowerShell-force is not strong, yet I managed to show the required data


Reverse engineering

Since the content of the DhcpInterfaceOptions key is not documented (or maybe I’ve searched on the wrong location) I had to reverse engineer the content. Once you know how the data is stored it’s really easy 🙂

Each DHCP option the following structure is used:

  • The first byte contains the option code, followed by 7 zeroed bytes;
  • Next is a byte containing the length of the value, followed by 3 zeroed bytes;
  • Then a byte specifying if this is a vendor specific option yes (1) or no (0), followed by 3 zeroed bytes;
  • Four bytes are filled with data I can’t explain, but it always ends with 0x51.
  • Finally the value is stored (in Hex values) in a block size dividable by 4 (!)


Here’s an example of how a vendor specific option (DHCP option 43) with code 12 containing the data www.ingmarverheij.com is stored:


Data types

To present the data, as done with the PowerShell script, you must know the data type. Unfortunately this is not stored in the DhcpInterfaceOptions  key, so that’s the reason I added the CSV files. For now I included the following data type: ip / string / time / dhcpmsgtype.

If the data type is not specified in the CSV file  the data is displayed in Hex values (just like Wireshark, DHCP test client and the Windows registry).

If you receive a Dhcp option that’s displayed in Hex values you can change the CSV files or e-mail me a Wireshark capture of your DHCPOFFER.


.

The post Read DHCP options received by the client appeared first on Ingmar Verheij.

Citrix PVS: Optimize endpoint with PowerShell

$
0
0

With Citrix PVS the content of a disk is streamed over the network to an endpoint. This requires sufficient bandwidth and an optimized configuration. If both criteria are not met the endpoint suffers from delays, retries or failures.

Ain't nobody got time for thatA number of best practices apply when using Citrix PVS, most of them probably apply for your situation. In the past I had to optimize my VM’s manually each and every time I had to create a new vDisk! Ain’t nobody got time for that (link)!

I wrote a PowerShell script that optimizes the endpoint for Citrix PVS and would like to share it with you.

Updated on June 18th, 2014 with version 1.7

Applied best practices

The script applies a number of best practices to optimize the performance of the PVS endpoint. Some are enabled by default, some are not.

OptimizePVSendpoint

Disable Task Offload

The most generic best practice that applies for (almost) every PVS environment, disabling all of the task offloads from the TCP/IP transport. See also CTX117491


Disable IPv6

vmxnet3 Ethernet Adapter - BindingsAlthough Citrix is working hard to get IPv6 working for all Citrix products, PVS does not support IPv6. Disabling IPv6 on your PVS endpoints prevent intermittent failures. For each network adapter the IPv6 binding is removed using the nvspbind utility. This utility is included in the download. Also, slow boots could occur due to IPv6. See also this TechNet article.


Disable TSO and DMA on XenTools

When you’re running your PVS endpoints on Citrix XenServer 5.0 or 5.5 poor target device performance, sluggish mouse responsiveness, application latency and slow moving screen changes might occur. This is a known bug that’s solved in (a hotfix of XenServer 5.6). See also CTX125157.


Increase UDP FastSend threshold

For every UDP packet larger than 1024 bytes, the Windows network stack waits for a transmit completion interrupt before sending the next packet. Unlike for earlier releases, vSphere 5.1 does not provide a transparent workaround of the situation. See also KB2040065


Set multiplication factor to the default UDP scavenge value

High CPU usage occurs when a Windows Server 2008 R2-based server is under a very heavy UDP load. This issue occurs because a table is too aggressively scavenged. See also KB2685007


Icons are hidden

To prevent users from accessing system tools like the PVS target device software or VMware tools the icons are removed.


Disable VMware debug driver

The virtual machine debug driver was disabled for this virtual machine message displays in event log. The virtual machine debug driver is not required in an ESX host. The driver is used for record/play functions in Fusion and Workstation products. See also KB1007652.

Receive Side Scaling is disabled

VMXNET3 resets frequently when RSS is enabled in a multi vCPU Windows virtual machine. When Receive Side Scaling (RSS) is enabled on a multi vCPU Windows virtual machine, you see NetPort messages for repeating MAC addresses indicating that ports are being disabled and then re-enabled. See also KB2055853.


Remove non-present NICs

Device Manager - Network adapters - Show non present devicesAfter removing a network adapter – for instance to replace an E1000 adapter with a vmxnet3 (because your deployment tool does not support vmxnet3) – the network adapter still exists on your Windows machine. The network adapter is not visible in device manager (see KB241257) but it’s active in the IP stack and, most likely, has a higher priority. As a result the PVS target device software is unable to communicate with the streaming server.

All Ethernet adapters that are not present on the machine are removed using the DevCon utility. The utility is included in the download, in case you lost it make sure you use version 6.1.7600.16385 from the Windows 7 WDK for x64 machines.

Default setting: Enabled


Network Adapter specific optimization

vmxnet3 Ethernet AdapterFor each network adapter (E1000, vmxnet3, vmbus, etc.) best practices exists, the most generic is disabling TCP offloading. Depending on the network adapter this has different names and some have more than one feature to disable.

Default setting: Enabled


The script changes the following sets the following properties:

Network Adapter Property Value
E1000 (VMware) Large Send Offload (IPv4) Disabled
vmxnet3 (VMware) IPv4 Giant TSO Offload Disabled
IPv4 TSO Offload Disabled
xennet6 (XenServer) Large Send Offload Version 2 (IPv4) Disabled
vmbus (Hyper-V) Large Send Offload Version 2 (IPv4) Disabled
Missing an adapter? Drop me an e-mail at info@ingmarverheij.com

All other properties listed in the Ethernet Adapter Properties dialog can be changed as well. All known properties and values are provided in the script, all you have to do is uncomment (removing the #-character) and set the value you want.  Do NOT enable options before you’ve tested this first and understand what the implications are.


Example
You want disable IPv4 Checksum Offload for the vmxnet3 adapter. The default value is 3 (Tx and Rx Enabled), to disable the feature you need to set the value to 0.  In the script go to lines 256, remove the # in front of  ‘Set-ItemProperty’ and set the value “0” and the end of the statement.

# --- IPv4 Checksum Offload ---
$strRegistryKeyName = "*IPChecksumOffloadIPv4"
# 0 - Disabled
# 1 - Tx Enabled
# 2 - Rx Enabled
# 3 - Tx and Rx Enabled (default)
Set-ItemProperty -Path ("HKLM:\SYSTEM\CurrentControlSet\Control\Class\{0}\{1}" -f "{4D36E972-E325-11CE-BFC1-08002BE10318}", ( "{0:D4}" -f $intNICid)) -Name $strRegistryKeyName -Value "0"


Tested platforms

The script is tested on multiple hypervisor platforms to ensure it covers the majority of the environments. In case your missing a hypervisor (or a version) feel free to contact me at info@ingmarverheij.com.

  • Citrix XenServer (6.0, 6.02 and 6.2)
  • Microsoft Hyper-V (2.0, 3.0 / 2012 and 2012 R2)
  • VMware ESX (4.0, 5.0, 5.1 and 5.5)


Usage and download

The script runs without arguments but requires elevated privileges, this is enforced by the script. Within the script you can enable / disable the features in the global options section (eg removing hidden NIC’s or unbinding IPv6). If wanted you can set advanced NIC properties by uncommenting the statement and providing the new value.

The script is best executed before the vDisk is uploaded but can also be run in Private mode (starting v1.6).

You can download the files here:  OptimizePVSendpoint


.

Thanks

I would like to thank the following people who where kind enough to test the script and provide me with feedback and test data:

  • Kees Baggerman – link
  • Wilco van Bragt – link
  • Iain Brighton – link
  • Tom Gamull – link
  • Andrew Morgan – link
  • Shaun Ritchie – link
  • Jeff Wouters – link
  • Bram Wolfs – link
  • Jonathan Pitre – link
  • Julien Destombes – link


.

The post Citrix PVS: Optimize endpoint with PowerShell appeared first on Ingmar Verheij.

Run and compile .NET code in RES Workspace Manager (using PowerShell)

$
0
0

There are occasions where you need a custom solution to fulfill a requirement which cannot be solved with existing applications or tools. This is usually where scripting comes into the picture, nowadays we tend to built most scripts using Microsoft PowerShell as it’s a very powerful framework with a huge repository of cmdlets. Nonetheless there are situation where PowerShell has no built-in cmdlet (or third party cmdlet is available) and you’d have to revert to API’s or .NET code.

Wouldn’t it be a shame if you’d have to write and compile .NET code using an IDE like Visual Studio before you can use that code? Well, there’s a solution!

Common Intermediate Language

“Windows PowerShell is Microsoft’s task automation and configuration management framework, consisting of a command-line shell and associated scripting language built on the .NET Framework. Common Intermediate LanguagePowerShell provides full access to COM and WMI, enabling administrators to perform administrative tasks on both local and remote Windows systems as well as WS-Management and CIM enabling management of remote Linux systems and network devices.”  – Source: Wikipedia

While you’d probably already knew PowerShell is built on the .NET Framework and therefor compiles to common intermediate language (CIL) before being executed, just like all other .NET languages like Visual C++.NET, Visual C#.NET, VB.NET and more. As a result a PowerShell script that’s executed effectively  results in the same code as when it’s executed in C# or C++, one of the strengths of .NET.


Add-Type

In PowerShell, administrative tasks are generally performed by cmdlets (pronounced command-lets), which are specialized .NET classes implementing a particular operation. One of the more powerful cmdlets is Add-Type.

Adds a Microsoft .NET Framework type (a class) to a Windows PowerShell session.

So with the Add-Type cmdlet you can basically run any .NET code as long as you can define it in a .NET Framework class. And yes this includes API’s Smile . There are a number of parameters (all of which are optional) you can provide of which a few of them I’ll describe below for all other information: MSDN

For this article I’ll assume you want to run or compile code from the PowerShell script, not refer to an assembly stored elsewhere (although that’s possible). If you only want to run the code from the PowerShell script there’s no need to specify the output, but if you want you can using OutputType and OutputAssembly.

Parameter Description Example values
Language Specifies the language that is used in the source code – CSharp (default)
– CSharpVersion3
– VisualBasic
– JScript
CompilerParameters Specifies the options for the source code compiler. These options are sent to the compiler without revision. Options like /unsafe, for more options see MSDN
OutputType Specifies the output type of the output assembly – Library
– ConsoleApplication
– WindowsApplication

By default no output type is specified (the code is not compiled to an assembly)OutputAssemblyGenerates a DLL (or EXE) file for the assembly with the specified name in the location. Enter a path (optional) and file name. Wildcard characters are permitted TypeDefinition

OR

@Specifies the source code that contains the type definitions. Enter the source code in a string or here-string, or enter a variable that contains the source code. UsingNamespaceSpecifies other namespaces that are required for the class. This is much like the Using keyword in C#.All .available .NET namespaces, for instance System.IO


Example

Knowing which cmdlet can be used to run or compile .NET code how is this actually done? Let me show how in two examples. The first example will show you how to run .NET code that enables you to directly use an API in PowerShell, in the second example I’ll show you how to compile .NET code to a console application.


Example 1 – Run an API from a PowerShell script

In this example I’ll show you how you can call the SendMessage function (or API) directly from a PowerShell script. In the example I’ve placed C# code in a string $Win32_SendMessage which I’ll add using the Add-Type cmdlet so I can call it from PowerShell.

$Win32_SendMessage = @'
using System;
using System.Runtime.InteropServices;
    public static class Win32 {
    public static uint WM_CLOSE = 0x10;
    public static uint WM_DESTROY = 0x0002;

    [DllImport("user32.dll", CharSet = CharSet.Auto, SetLastError = false)]
    public static extern IntPtr SendMessage(IntPtr hWnd, UInt32 Msg, IntPtr wParam, IntPtr lParam);
}
'@

Add-Type -TypeDefinition $Win32_SendMessage

$p = @(Get-Process -Name Notepad)[0]
[Win32]::SendMessage($p.MainWindowHandle, [Win32]::WM_CLOSE, $zero, $zero) > $null

The script will close Notepad by sending a WM_CLOSE message to the process.


Example 2 – Compile c# code to a console application

In this example I’ll show you how to compile c# sharp code to a console application using PowerShell. The example  is the typical Hello World code from the a the C# Hello World Tutorial.

Add-Type -OutputType ConsoleApplication -OutputAssembly "HelloWorld.exe" @'
public class Hello1
{
   public static void Main()
   {
      System.Console.WriteLine("Hello, World!");
   }
}
'@

The output of the script is an console application called “HelloWorld.exe” which, when executed, prints “Hello, World!” on the screen.


RES Workspace Manager (optional)

Now you know how you can use PowerShell to run and compile all .NET code using PowerShell without having an IDE (like Visual Studio) let me show you how you do this using RES Workspace Manager. Depending on your needs you want to use RES Workspace Manager, or not.

The advantage of using RES Workspace Manager to run .NET code is timing and security,. You decide at what event (like user logon, network state change or when an application is launched – very powerful!) the code is executed from a managed environment. There’s no need to worry about if the script files are accessible or when someone’s changed it, that’s all available by default.

Command

RES Workspace Manager can execute commands to run applications tools or tools but can also run a script. When code is put in the script tab and %script% is used in the command line (or parameter) a temporary file with the provided extension is created on execution.

If RES Workspace Manager needs to execute a PowerShell script the following command line can be provided:

powershell.exe %script%

Personally I prefer to specify the full path and included parameters to set the execution policy, but his is optional:

%Windir%\System32\WindowsPowerShell\v1.0\powershell.exe -ExecutionPolicy Bypass %Script%

Execute Command - PropertiesExecute Command - Script


Dynamic Privileges

Even better is the ability to execute a command (or a script) with administrative privileges even when the user hasn’t. This means that a regular user can execute a very powerful PowerShell script (calling API’s and stuff) with administrative privileges without granting this user with permissions it shouldn’t have. Dynamic Privileges are cool IMHO, especially since you can enable this feature on a specific action for an application or for the whole application.

Execute Command - Properties - Dynamic Priviliges

.

.

The post Run and compile .NET code in RES Workspace Manager (using PowerShell) appeared first on Ingmar Verheij.


Viewing all 35 articles
Browse latest View live